Introduction to Chicken Katsu Bowls
What is a Chicken Katsu Bowl?
If you’re new to the world of Japanese cuisine, you might be wondering: what exactly is a chicken katsu bowl? At its core, it’s a delightful dish featuring crispy, breaded chicken cutlets served over steaming rice, usually topped with a vibrant mix of vegetables and drizzled with a savory sauce. This delicious combination not only tantalizes your taste buds but also provides a satisfying, hearty meal.
Originating from the traditional Japanese katsu, which means “cutlet,” this bowl takes comfort food to a whole new level. You can customize your bowl by adding fresh greens, pickled vegetables, or even a soft-boiled egg. The beauty of the chicken katsu bowl lies in its versatility and the opportunity to infuse your personal touch. If you’re eager to explore an air fryer chicken katsu recipe, you’re in for a treat!
Why is Homemade Cooking Important for Young Professionals?
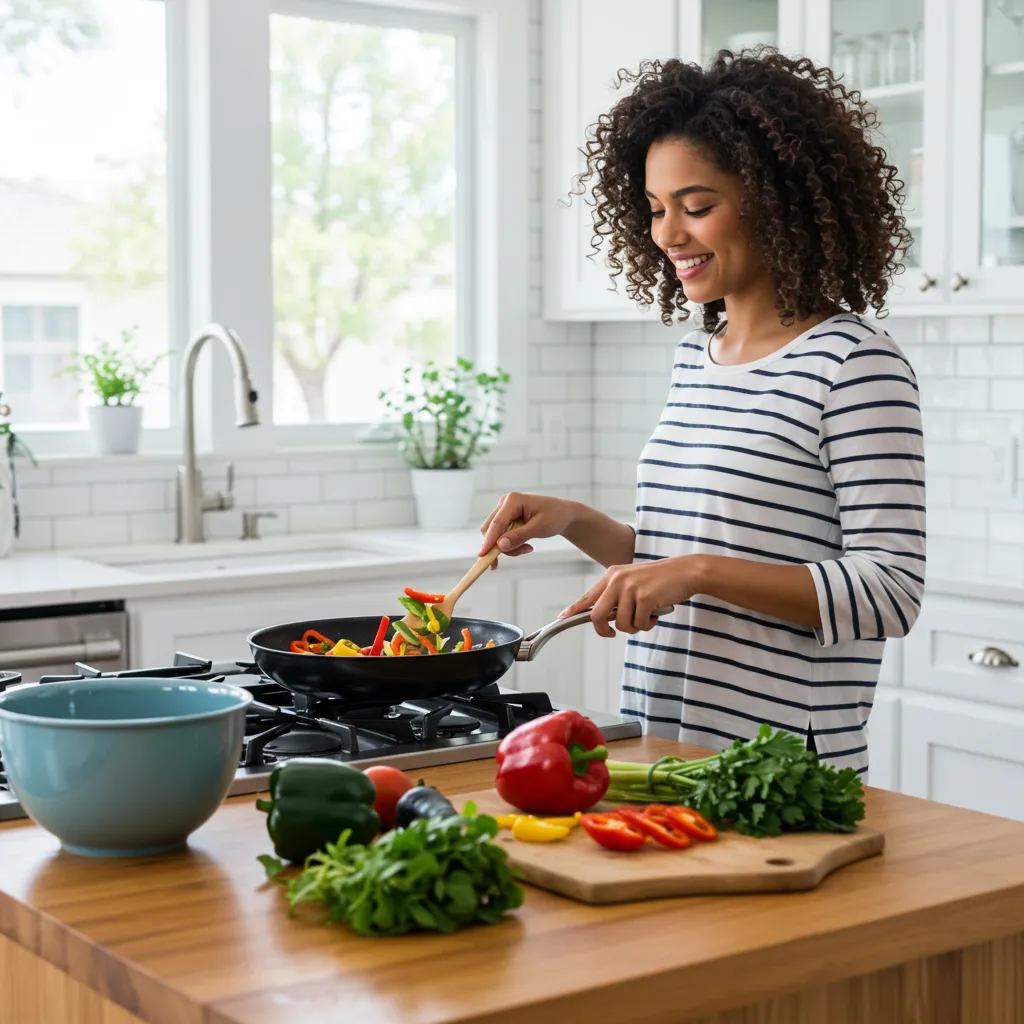
As a young professional, life can often feel like a whirlwind. Juggling work, social life, and personal commitments can leave little time for much else. However, spending time in the kitchen can be a rewarding and therapeutic experience. Research shows that home-cooked meals not only improve nutrition but also foster a sense of accomplishment. Cooking for yourself allows you to make better dietary choices, control ingredients, and save money compared to dining out regularly.
Moreover, preparing dishes like a chicken katsu bowl can be an enjoyable way to unwind after a long day. Think of it as a creative outlet, where you get to experiment with flavors and techniques. You can even share this newfound culinary passion with friends or loved ones, creating lasting memories over delicious, home-cooked meals.
Exploring resources like The Kitchn or Serious Eats can guide you on your journey from novice to kitchen virtuoso! So why not embrace the joy of cooking and elevate your weeknight dinners with a scrumptious, homemade chicken katsu bowl?
Ingredients for Chicken Katsu Bowls
When it comes to creating the perfect chicken katsu bowl, having the right ingredients is essential for achieving that irresistible flavor and crunch. Let’s break down what you’ll need to gather for this delicious dish.
The Chicken Ingredients
- Chicken Breasts: Opt for boneless, skinless chicken breasts to ensure tenderness.
- Panko Breadcrumbs: This Japanese-style breadcrumb gives your katsu that lovely crispy exterior.
- Egg: A beaten egg acts as a binder for the panko.
- Seasoning: Salt and pepper to taste.
The Katsu Sauce Ingredients
- Soy Sauce: A key player that provides the savory depth.
- Mirin: This sweet rice wine adds a delightful brightness – or you can use a splash of rice vinegar as a substitute.
- Sugar: Just a touch to balance the flavors, brown sugar works great here.
The Pickled Vegetables Ingredients
- Carrots and Cucumber: Thinly sliced for a refreshing crunch. Try this recipe on pickling cucumbers for an extra zing!
- Rice Vinegar: Essential for pickling; brings all those vibrant flavors together.
With these ingredients on hand, you’re ready to whip up a fantastic chicken katsu bowl that will impress anyone at the dinner table! For a deep dive into each component, check out this guide on Japanese cooking for more tips and tricks.
Step-by-step Preparation of Chicken Katsu Bowls
Making a delicious Chicken Katsu Bowl is an exciting culinary adventure, and when you use an air fryer, it can be both healthier and easier! Let’s dive into the step-by-step preparation, where each component brings something special to the bowl.
Prepare the Pickled Vegetables
Pickled vegetables add a crunchy, tangy bite that balances the rich flavors of the crispy chicken. Here’s how to prepare them:
- Ingredients:
- 1 cup of shredded carrots
- 1 cup of thinly sliced cucumbers
- 1/2 cup of rice vinegar
- 1 tablespoon of sugar
- 1 tablespoon of salt
- Optional: red pepper flakes for a hint of spice
Instructions:
- In a bowl, mix the rice vinegar, sugar, and salt, stirring until the sugar dissolves.
- Add the shredded carrots and sliced cucumbers to the mixture.
- Let them pickle for at least 30 minutes. The longer you leave them, the more flavor they’ll absorb!
This simple process not only enhances the taste of your Chicken Katsu Bowl but also offers a fantastic way to add some color and nutrients to your meal. Plus, pickling vegetables is a great skill to have; you can explore pickled onions or daikon too!
Make the Katsu Sauce
No chicken katsu is complete without a savory sauce that brings everything together.
- Ingredients:
- 1/4 cup of ketchup
- 1/4 cup of Worcestershire sauce
- 1 tablespoon of soy sauce
- 1 tablespoon of mustard
Instructions:
- In a small bowl, whisk together all the ingredients until combined.
- Taste! Adjust the balance of sweetness or tang to suit your preferences—a splash more ketchup for sweet, or a touch more Worcestershire if you crave depth.
This katsu sauce is so versatile; you might just find yourself using it on everything from grilled meats to burgers!
Prepare the Chicken (Stovetop and Air Fryer Instructions)
Now, onto the star of the dish: the chicken! Using the air fryer not only cuts down on oil but also makes cleanup a breeze.
- Ingredients:
- 2 boneless, skinless chicken breasts
- 1 cup of panko bread crumbs
- 1/2 cup of all-purpose flour
- 2 eggs
- Salt and pepper to taste
Instructions:
Air Fryer Method:
- Preheat your air fryer to 375°F (190°C).
- Season the chicken breasts with salt and pepper.
- Set up three bowls: one with flour, one with beaten eggs, and one with panko breadcrumbs.
- Dredge each chicken breast in flour, dip it in the eggs, and finally coat it with panko.
- Place the coated chicken in the air fryer basket, ensuring they aren’t touching.
- Air fry for about 12-15 minutes, flipping halfway through, until they’re golden brown and cooked through.
Stovetop Method (if you don’t have an air fryer):
- Heat a few tablespoons of oil in a skillet over medium heat.
- Follow the same dredging process as above, then carefully place the chicken in the hot oil.
- Cook for approximately 6-7 minutes on each side or until golden brown and cooked through.
Cooking chicken this way is not only delicious but super satisfying when you see that crispy texture come to life!
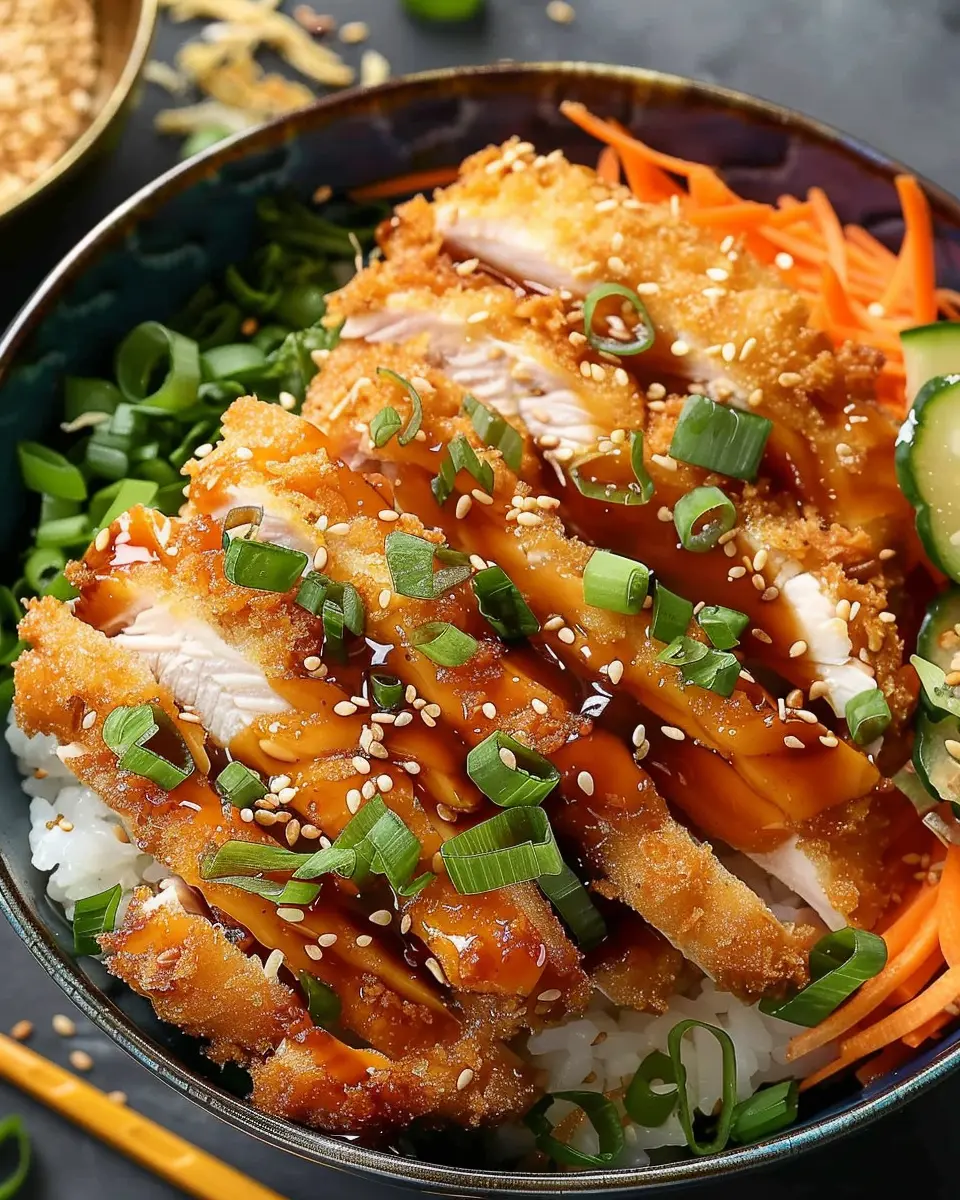
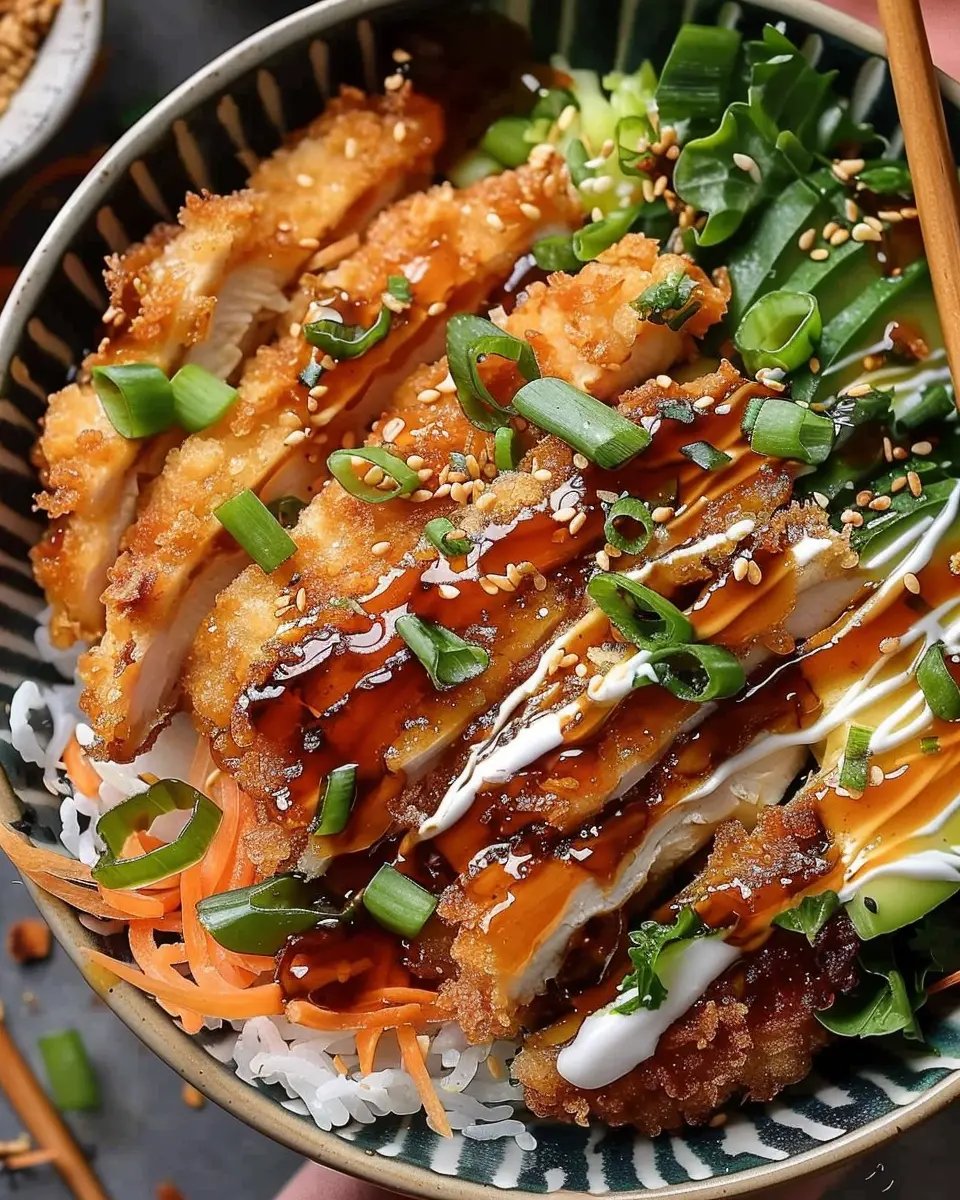
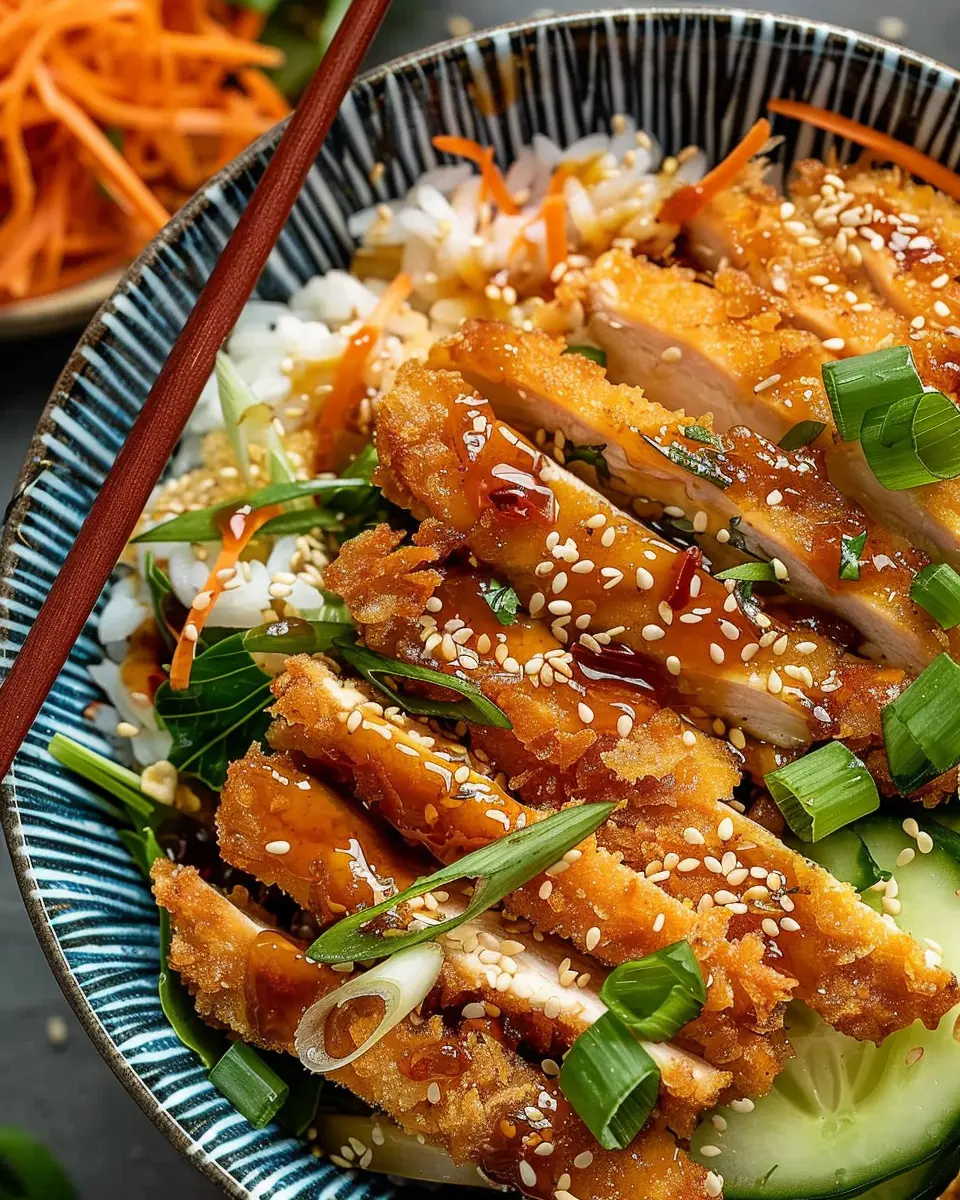
Assemble the Bowls
Now for the fun part! Assembling your Chicken Katsu Bowls is where you can really get creative.
- Ingredients for assembly:
- Cooked rice (white, brown, or sushi rice)
- Your pickled veggies
- Katsu sauce
- Optional toppings: sliced green onions, sesame seeds, or nori strips
Instructions:
- Start with a generous scoop of cooked rice at the bottom of each bowl.
- Place the crispy chicken on top.
- Add your pickled vegetables beside the chicken for color and texture.
- Drizzle with the delicious katsu sauce, and finish with any optional toppings.
Voila! You have a stunning Chicken Katsu Bowl that’s just waiting to be devoured. Enjoy this dish during a casual dinner or impress your friends at your next gathering.
Remember, the best meals come from a mix of good ingredients and good company!
Variations on Chicken Katsu Bowls
Vegetarian Katsu Bowls
Craving a chicken katsu bowl but want to skip the meat? No worries! You can whip up a delicious vegetarian version in no time. Simply substitute the chicken with crispy, breaded eggplant or zucchini. Follow the same breading process, using panko for that satisfying crunch. It pairs beautifully with your choice of a savory sauce, such as a soy-based dressing or a drizzle of teriyaki. You’ll still enjoy that quintessential katsu experience without the meat!
Spicy Katsu Bowls
For the spice aficionados out there, why not crank up the heat? A spicy chicken katsu bowl can be created by marinating your chicken in a blend of gochujang (Korean chili paste) or sriracha mixed with a bit of soy sauce. This adds a zing to your traditional recipe. Serve it atop a bed of fluffy rice, topped with pickled vegetables, and finish it with a sprinkle of sesame seeds for extra flair. The kick is guaranteed to liven up your dinner!
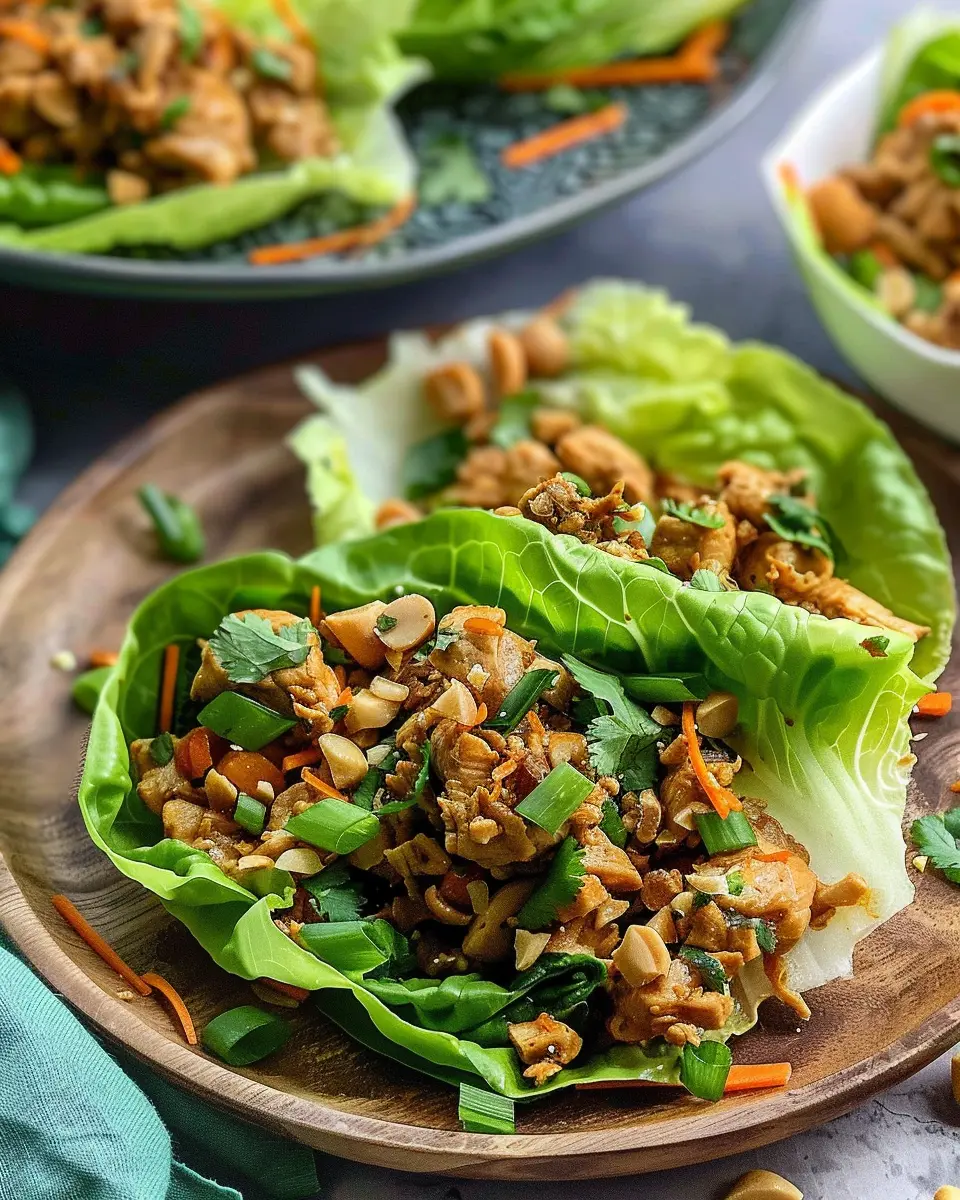
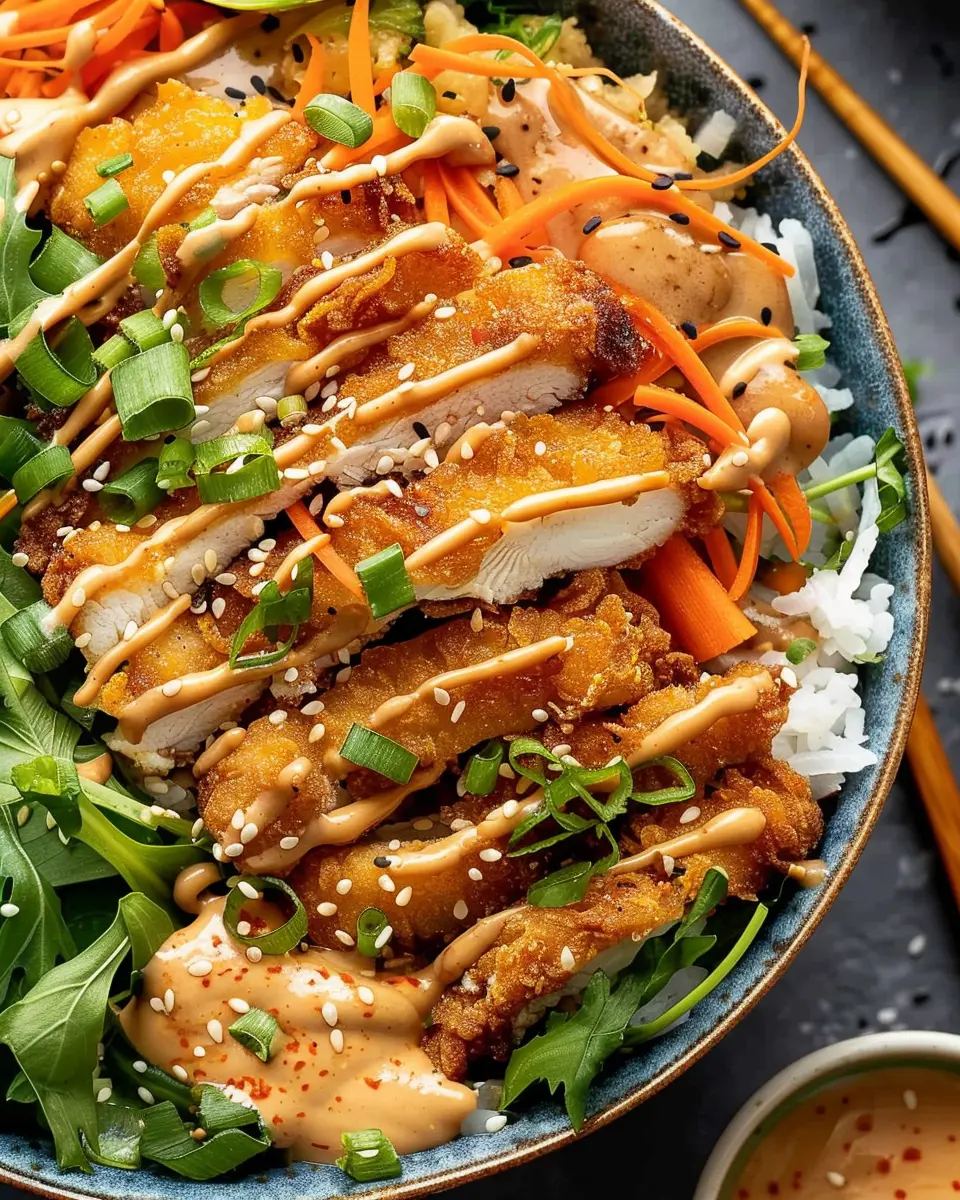
Bowl with Extra Toppings
Feeling adventurous? Customize your chicken katsu bowl with additional toppings! Consider adding:
- Turkey bacon: For a smoky crunch.
- Chicken ham: To introduce a savory layer.
- Avocado slices: For creaminess.
- Steamed broccoli: To boost nutrition and color.
- Soft-boiled eggs: For richness and extra protein.
The beauty of a katsu bowl is its versatility; it can easily adapt to suit your cravings or even seasonal ingredients. You’ll find it not only satisfies your hunger but also your creativity in the kitchen!
For more topping ideas, check out this culinary resource.
Cooking Tips and Notes for Chicken Katsu Bowls
Choosing the Right Chicken
When making your chicken katsu bowl, selecting the right cut of chicken is key. Boneless, skinless chicken breasts are popular for their lean texture, but using chicken thighs can offer a juicier bite—plus, they are often more forgiving if overcooked. Regardless of your choice, aim for even thickness for uniform cooking!
Tips for Perfectly Crispy Katsu
Achieving that signature crispy coating is all about technique. Start by patting your chicken dry to help the panko breadcrumbs stick. Dredge the chicken in flour, then dip it in a beaten egg wash before coating it in panko. For extra crunch, consider double-coating—it’s a game-changer! Air frying at the right temperature ensures a golden exterior while keeping the inside moist. For detailed air fryer techniques, check out Air Fryer Guide.
Storing Leftovers
If you find yourself with leftover chicken katsu, don’t worry! Store it in an airtight container in the fridge for up to three days. To maintain crispiness, reheat in the air fryer for a few minutes rather than the microwave, which tends to make breaded items soggy. Enjoy your delicious chicken katsu bowl again without compromising on texture!
Serving Suggestions for Chicken Katsu Bowls
Pairing with Beverages
When enjoying a chicken katsu bowl, the right beverage can elevate your meal to new heights. Consider pairing your bowl with refreshing iced green tea, which complements the dish’s crunchiness and richness beautifully. If you’re in the mood for something bubbly, sparkling water with a splash of citrus enhances the flavors without overpowering them. Remember, hydration is key, especially during busy weeknights! You can explore drink options that fit your taste preferences through sites like Serious Eats for more ideas.
Garnishing Tips
The garnish is where your chicken katsu bowl can really shine! Here are some delightful topping suggestions:
- Thinly sliced green onions: They add a pop of color and a fresh kick.
- Sesame seeds: Sprinkle these on top for a nutty flavor and a touch of elegance.
- Pickled ginger: A bright contrast that can cut through the richness of the chicken.
- Nori strips: These add a fun texture and a slight umami flavor.
Let your creativity flow!
Embrace what makes your bowl unique and share your garnishes with friends and family! They’ll love discovering new flavors as much as you will.
Time Breakdown for Chicken Katsu Bowls
Preparation Time
Getting started on your chicken katsu bowl is a breeze! Set aside about 15-20 minutes to gather all your ingredients and prep everything. This step involves slicing the chicken, setting up your air fryer, and crushing those crispy breadcrumbs. Trust me, having everything ready in advance makes cooking a joy!
Cooking Time
Once you’re prepped, cooking is a quick affair—around 20 minutes in the air fryer. While it crisps up, you can whip up some steamed rice or a quick salad to accompany your chicken katsu bowl. Multitasking in the kitchen is key for any busy professional!
Total Time
All in all, expect about 40-45 minutes from start to delicious finish. Perfect for a weeknight dinner when you want something comforting yet quick! If you’re curious about variations, check out resources like Serious Eats for expert tips. Happy cooking!
Nutritional Facts for Chicken Katsu Bowls
When diving into a chicken katsu bowl, it’s important to know what you’re fueling your body with. Here’s a quick breakdown of the nutritional facts to keep your meals balanced and delicious:
Calories
A typical chicken katsu bowl serves up around 400 to 500 calories. This makes it a satisfying option without overwhelming your daily intake.
Protein
Packed with protein, a single serving provides about 25 to 30 grams. This protein content helps to keep you feeling full and provides the necessary building blocks for muscle recovery, especially after a workout.
Sodium
Beware of the sodium! Depending on the sauces used, the sodium levels can range from 800 to 1200 mg. It’s wise to check labels and perhaps opt for low-sodium alternatives to keep your heart happy.
By understanding these numbers, you can enjoy your chicken katsu bowl guilt-free, knowing you’re making a nutritious choice. For further insights on nutrition, websites like Healthline can be an invaluable resource.
FAQs about Chicken Katsu Bowls
Can I use other proteins instead of chicken?
Absolutely! While chicken is the star of the chicken katsu bowl, you can easily swap it for other proteins based on your preferences. For example:
- Pork: A classic choice, just remember to use beef instead of traditional pork.
- Fish: Try using firm whitefish or salmon for a delightful twist.
- Tofu: For a vegetarian option, press and marinate tofu before coating it in the katsu crumbs.
Each of these alternatives will bring its unique flavor and texture to your bowl.
How do I make the katsu sauce spicier?
If you like a kick in your chicken katsu bowl, enhancing the katsu sauce is simple! Here are a few tips:
- Add Sriracha: Mix in a tablespoon or two for heat without overpowering the flavor.
- Chili Flakes: A sprinkle of red chili flakes can elevate the spice level to your liking.
- Wasabi: For an adventurous twist, try adding a small dab of wasabi to your sauce!
Experimenting with these ingredients can help you find the perfect balance of flavor and spice.
What’s the best way to reheat leftover Chicken Katsu?
No one likes soggy leftovers! To reheat your chicken katsu bowl while keeping it crispy, consider these options:
- Air Fryer: The best method for retaining crispiness. Preheat to 350°F (175°C) and heat for about 3-5 minutes.
- Oven: Place the chicken on a baking sheet and cover lightly with foil. Bake at 375°F (190°C) for about 10-15 minutes.
- Skillet: Heat a little oil in a pan and reheat over medium heat, flipping to keep it crispy.
Leftover chicken katsu can be a great way to enjoy your meal again, maintaining that delicious crunch!
Conclusion on Chicken Katsu Bowls
Why You Should Try Making Your Own Chicken Katsu Bowl
If you haven’t savored the joy of a homemade chicken katsu bowl, you’re in for a delightful treat. Crafting your own version lets you control the flavors and ingredients, ensuring a healthier dish tailored to your taste. Plus, it’s a fantastic way to impress friends at dinner parties or cozy nights in—all while keeping things simple!
Making chicken katsu is not only therapeutic but also a fun way to explore culinary creativity. Try experimenting with seasonal vegetables or different sauces! To dive deeper into the Japanese culinary world, check out resources from Taste of Home. Get started today—you’ll find that enjoying this simple yet delicious dish at home is incredibly rewarding!
PrintChicken Katsu Bowl Recipe with Air Fryer: Crispy and Delicious at Home

Learn how to make a delicious Chicken Katsu Bowl using an air fryer for a crispy and healthy twist on a classic dish.
- Prep Time: 15 minutes
- Cook Time: 15 minutes
- Total Time: 30 minutes
- Yield: 2 servings 1x
- Category: Dinner
- Method: Air Frying
- Cuisine: Japanese
- Diet: Gluten-Free
Ingredients
- 2 boneless chicken breasts
- 1 cup panko breadcrumbs
- 1/2 cup all-purpose flour
- 2 eggs
- 1/4 cup mayonnaise
- 1 tablespoon soy sauce
- 1 tablespoon rice vinegar
- 2 cups cooked rice
- 1 green onion, sliced
- 1 tablespoon sesame seeds
Instructions
- Preheat the air fryer to 400°F (200°C).
- Prepare the chicken by pounding it to even thickness and seasoning with salt.
- Set up a dredging station with flour, beaten eggs, and panko breadcrumbs.
- Dip the chicken into each station and ensure it’s well coated.
- Place the chicken in the air fryer basket and spray lightly with cooking spray.
- Cook for 12-15 minutes, flipping halfway through until golden brown.
- Serve on top of cooked rice, drizzled with a mixture of mayonnaise, soy sauce, and rice vinegar.
- Garnish with sliced green onions and sesame seeds.
Notes
- For extra crispiness, consider double breading the chicken.
- Feel free to add vegetables to the bowl, such as shredded cabbage or carrots.
Nutrition
- Serving Size: 1 bowl
- Calories: 600
- Sugar: 2g
- Sodium: 800mg
- Fat: 25g
- Saturated Fat: 4g
- Unsaturated Fat: 18g
- Trans Fat: 0g
- Carbohydrates: 60g
- Fiber: 3g
- Protein: 30g
- Cholesterol: 150mg
Keywords: Chicken Katsu Bowl, Air Fryer, Recipe, Crispy, Delicious