Introduction to Stained Glass Cookies
What are Stained Glass Cookies?
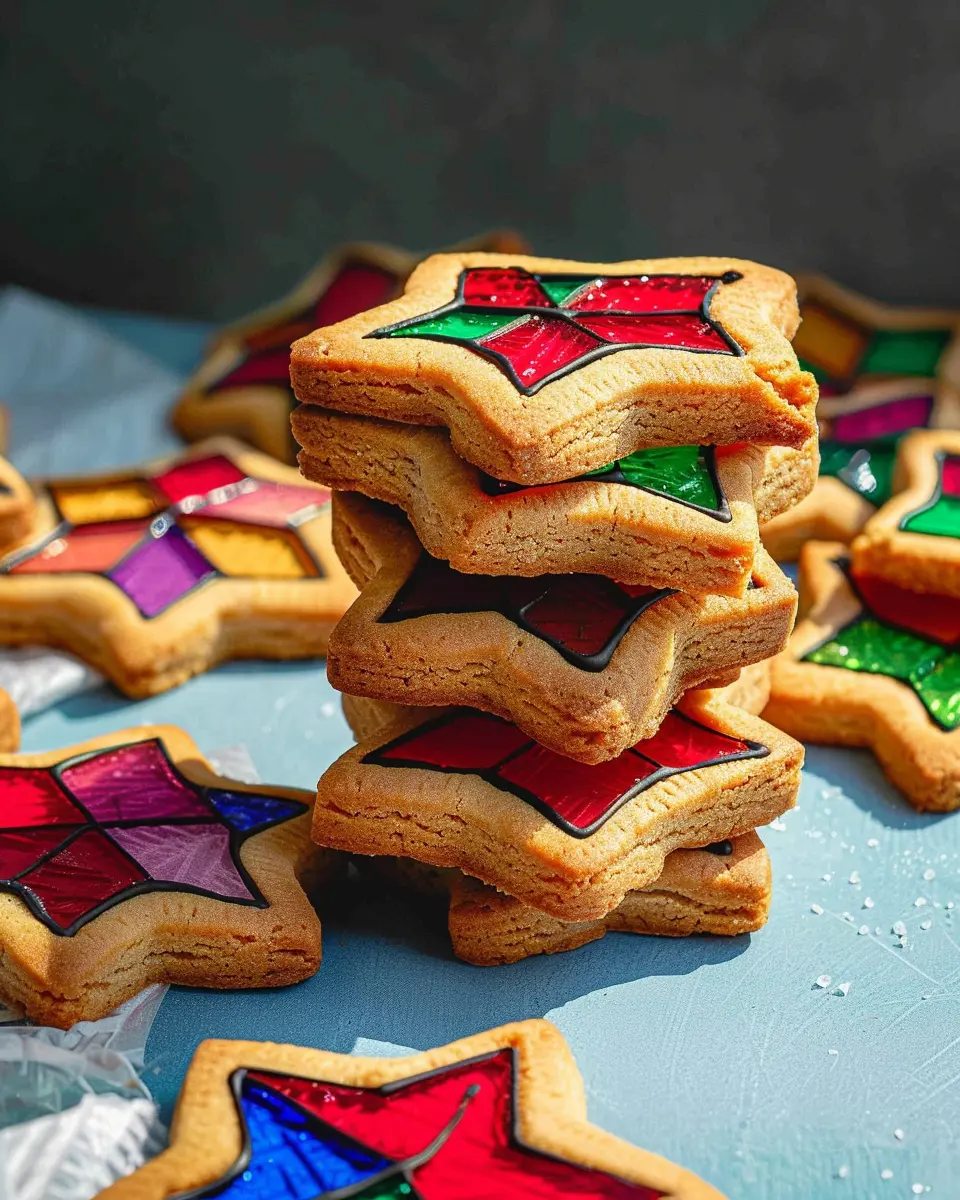
Stained glass cookies are a delightful treat that combines artistic design with delicious flavors. Picture this: a buttery cookie base, cut into shapes, and filled with vibrant hard candies that melt and create a beautiful “stained glass” effect once baked. These cookies not only taste great but also add a decorative touch to any occasion. They’re particularly popular during the holidays for their festive appearance, yet they’re fun to make year-round!
The process begins with a classic sugar cookie dough, which is rolled out and can be shaped into anything from stars to hearts. Different colored candies—like Jolly Ranchers or Life Savers—are crushed and placed in the center before baking, resulting in a striking visual treat. If you’re curious about the science behind the melting effects of sugar and heat, check out this article on sugar melting.
Why You’ll Love Making These at Home
Making stained glass cookies at home is not just about baking; it’s an experience filled with creativity and joy. Here are a few reasons why these cookies should have a spot in your kitchen rotation:
- Creative Outlet: You can unleash your artistic side! Customize your cookies with different shapes, colors, and designs to match the season or your personal style.
- Family Fun: This recipe is a great way to engage with family or friends. From crushing candies to decorating, everyone can join in on the fun, making it a cherished gathering activity.
- Impressive Presentation: When you serve these cookies, prepare for a round of compliments. Their unique appearance will have guests asking, “How did you make these?”—a fantastic way to showcase your culinary skills.
- Versatile Recipes: Stained glass cookies can be adapted. Feel free to experiment with flavored oils or themed cutouts to suit any celebration.
When you take the time to bake these cookies, you’re not just creating a snack; you’re crafting sweet memories. Ready to dive into the colorful world of stained glass cookies? Let’s get started!
Ingredients for Stained Glass Cookies
Essential ingredients for delicious stained glass cookies
Making stained glass cookies is not only a fun activity, but it also requires a few essential ingredients to achieve that perfect balance of flavor and aesthetics. Here’s what you’ll need:
- All-purpose flour: The foundation of your cookies.
- Butter: Unsalted works best for control over saltiness.
- Granulated sugar and brown sugar: A combination yields a chewy texture.
- Eggs: They bind everything together and add richness.
- Vanilla extract: Improves flavor complexity.
- Baking powder: For a slight rise.
- Colorful candies: To create that stunning stained glass effect (more on that below!).
Tips for choosing colorful candies
When selecting candies for your stained glass cookies, consider the following tips to ensure vibrant results:
- Look for Jolly Ranchers or Life Savers—these hard candies melt beautifully and maintain their color.
- Choose fruit-flavored varieties; they tend to keep their bright hues and add a delightful flavor.
- Avoid candies that contain a lot of white or milk chocolate, as they won’t show up well against the cookie dough.
For more detailed candy options, visit Candy.com for a broad selection. The right candies can elevate your cookies from ordinary to extraordinary!
Preparing Stained Glass Cookies
Baking stained glass cookies is not just about the end product; it’s a delightful journey that combines creativity and deliciousness. These vibrant cookies, featuring colorful candy centers, are perfect for holiday gatherings, kids’ parties, or any occasion that calls for a sprinkle of whimsy. Let’s break down this simple process into manageable steps that will have you baking like a pro in no time!
Cream the butter and sugar
The first step in preparing your stained glass cookies is to cream together the butter and sugar. This foundational process is crucial as it helps create a light and airy cookie texture. Start by using unsalted butter at room temperature, which should make it softer and easier to work with.
- Use a mixer on medium speed to beat:
- 1 cup unsalted butter
- 1 cup granulated sugar
Continue mixing until the mixture is fluffy and pale, usually around 2-3 minutes. This step introduces air into your cookie dough, which leads to beautifully textured cookies.
Add eggs and vanilla
Next, it’s time to add the eggs and vanilla. This combination not only brings moisture but also infuses flavor into your cookies.
- Gradually add:
- 2 large eggs
- 1 teaspoon vanilla extract
Mix until fully incorporated. Ensure there are no visible streaks of egg – this is your opportunity to really blend those flavors together!
Incorporate the flour
Now, let’s get to the heart of the cookie dough: the flour. Gradually add 3 cups of all-purpose flour, mixing on low speed to prevent flour from flying everywhere. As you work, you might notice that the dough is starting to come together beautifully.
- Add 1 teaspoon of baking powder and a pinch of salt to enhance flavor and texture.
This part of the process is essential – too much flour can lead to dry cookies, while too little can cause them to spread too much during baking. A balanced dough ensures the stained glass cookies maintain their shape.
Chill the dough
After you’ve mixed everything, the dough needs some time to chill. This step is vital as it helps prevent the cookies from spreading too much in the oven.
- Wrap your dough in plastic wrap and refrigerate it for at least 2 hours, or overnight if you have the time.
This wait can make the difference between a chewy cookie and a crispy one, so don’t rush it!
Roll and cut the cookies
Once your dough is nice and chilled, it’s time to roll and cut your cookies. Lightly flour your work surface and roll out the dough to about 1/4 inch thickness.
- Use cookie cutters in your desired shapes, and don’t forget to make a smaller hole in the center for the candy!
Consider using unique shapes for a festive twist; stars or hearts can elevate your cookie game. Take your time with this step to ensure even thickness for uniform baking.
Prepare the candy filling
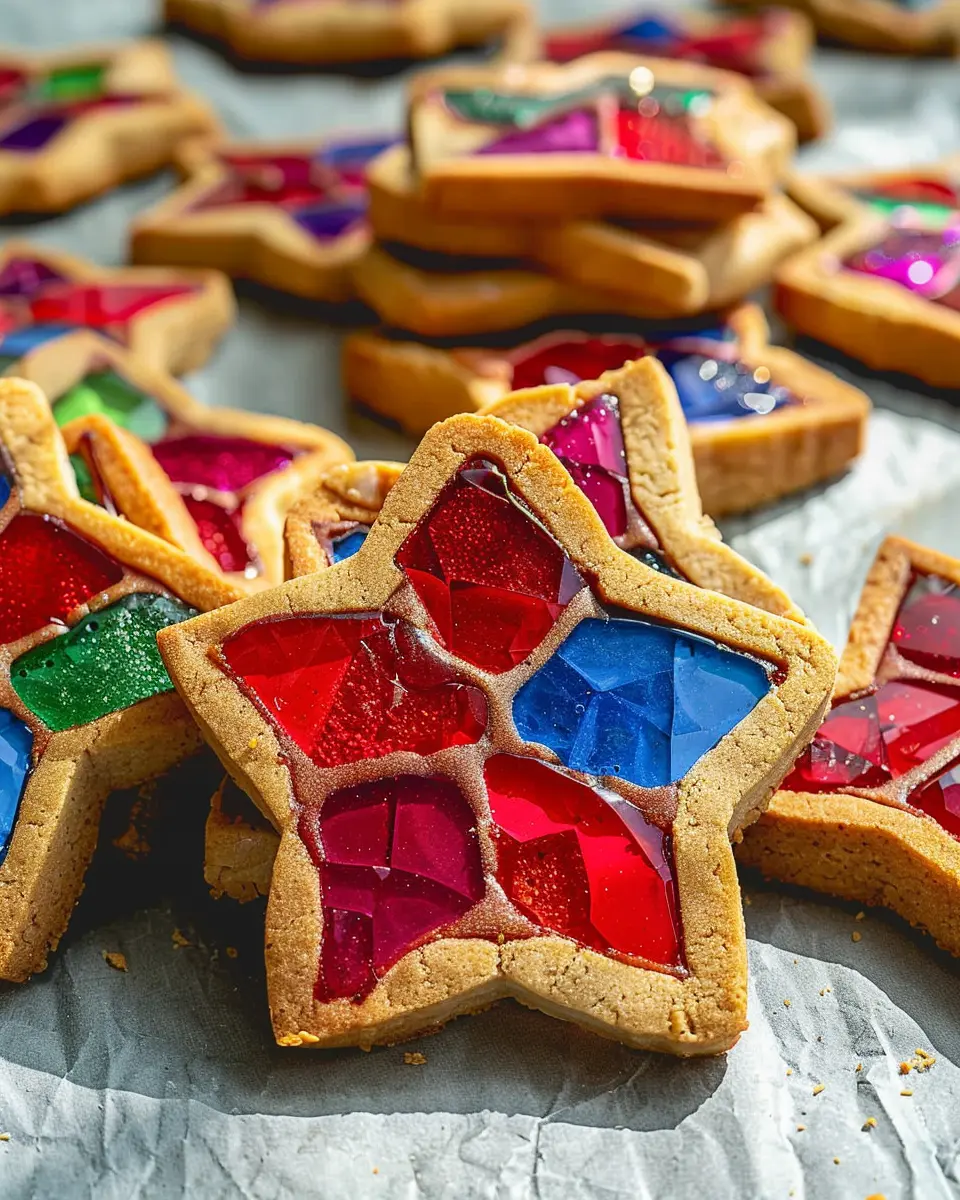
This is where the magic happens! For your candy filling, crush some colorful hard candies – think Jolly Ranchers or Life Savers. Aim for small pieces but not dust; you want enough texture to fill the cut-out areas beautifully.
Bake to perfection
Finally, it’s time to bake your stained glass cookies.
- Preheat your oven to 375°F (190°C).
- Add the crushed candy to the centers of each cookie.
Bake for about 8-10 minutes or until the edges are lightly golden. The candy will melt and create that stunning stained glass effect. Allow them to cool completely on a wire rack after baking.
Pro Tip: Make sure you keep an eye on them as they bake to prevent the candy from bubbling over.
By following these steps, you’ll have a batch of vibrant, mouth-watering stained glass cookies that will impress anyone who lays eyes on them! For further tips and tricks, you might find these cookie decorating resources from The Spruce Eats helpful. Enjoy your baking adventure!
Variations on Stained Glass Cookies
Stained glass cookies are a delightful twist on traditional cookies, making them not only delicious but also visually stunning. Why stick to just one flavor or shape when you can mix things up? Let’s explore some fun variations!
Fun Color Combinations
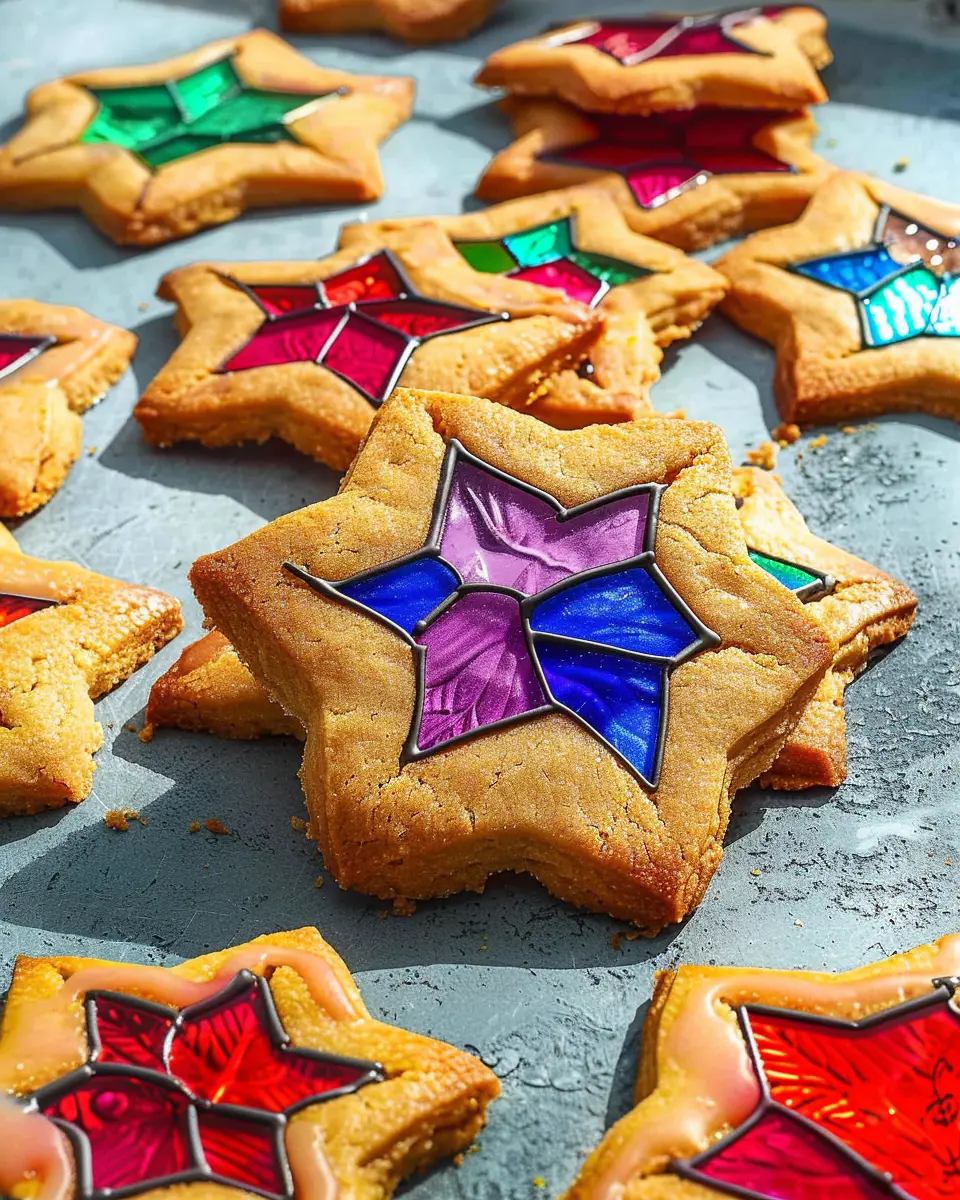
One of the best parts of making stained glass cookies is the opportunity for artistic expression through color. Instead of the classic red and green for the holidays, consider:
- Pastels: Soft pinks, blues, and greens give a gentle, spring-like feel perfect for Easter.
- Bold Tones: Vibrant oranges, yellows, and purples create eye-catching designs that work wonderfully for fall or summer parties.
- Theme-Based Colors: Match your colors to an occasion, like using team colors for game day or seasonal colors for various holidays.
Each color combination can evoke different moods or themes, so get creative!
Alternative Shapes and Decorations
While classic cookies are often round or star-shaped, experimenting with shapes can elevate your stained glass cookies to new heights. Consider these options:
- Seasonal Shapes: Use cookie cutters shaped like pumpkins in October or hearts for Valentine’s Day.
- Layering Techniques: Try stacking smaller cookies or using different sprinkles beneath the window-like candy.
- Edible Paint: After baking, why not decorate with edible glitter or paints to customize each cookie further?
If you’re curious about using natural coloring agents for your cookies, check out this insightful article from Healthline on natural food coloring tips.
With these variations, your stained glass cookies will not only satisfy the taste buds but also impress with their artistic flair. So, gather your ingredients and have fun experimenting!
Cooking Tips and Notes for Stained Glass Cookies
How to Achieve the Perfect Cookie Texture
To create delicious stained glass cookies, focus on your dough’s texture. You want a balance of softness and firmness. Start by chilling your dough for at least 30 minutes; this step is essential as it prevents the cookies from spreading too much while baking. Roll the dough to an even thickness (about 1/4 inch) for uniform baking. Consider using a silicone baking mat for easy removal and to avoid sticking.
Common Mistakes to Avoid
When making stained glass cookies, there are a few pitfalls to watch out for:
- Overmixing the Dough: This can lead to tough cookies. Mix just until combined.
- Incorrect Oven Temperature: Always use an oven thermometer to ensure accuracy. A preheated oven is key to achieving that perfect golden brown.
- Using Regular Candy: Stick to hard candies like Jolly Ranchers for the see-through effect. Other types may not melt properly.
These tips will help you serve up cookies that not only look good but taste amazing as well! For more insights, check out the Baking Science blog for detailed techniques and deeper dives into baking science.
Serving suggestions for Stained Glass Cookies
Presentation ideas for special occasions
When it comes to stained glass cookies, presentation is key to making a lasting impression. For birthdays, consider displaying your colorful cookies in a bright, tiered stand adorned with ribbons matching your party theme. For holidays, a simple glass jar filled with these vibrant sweets will not only attract attention but also serve as a delightful centerpiece. You might also want to arrange them on a festive platter, perhaps layering with parchment paper for a chic touch.
Personal touch is always appreciated! Think about personalizing each cookie with a small tag or card that shares the occasion or a sweet message. This adds warmth to any gathering!
Pairing with beverages
Let’s talk pairings! Enjoying stained glass cookies with the right beverage can elevate your experience. A warm cup of herbal tea, like chamomile or peppermint, complements the sweetness beautifully. If you’re in the mood for something a bit more refreshing, a bright lemonade or citrus-infused sparkling water provides a lovely contrast.
And don’t forget the classics! A glass of cold milk is a nostalgic choice that never goes out of style. Pairing cookies with beverages can make your snack time feel extra special. So next time you whip up a batch, experiment with different drink combos and discover your favorite! For more ideas, check out Serious Eats for inspiration.
Time breakdown for Stained Glass Cookies
Preparation time
Getting started on your stained glass cookies is half the fun! You’ll want to set aside about 30 minutes for preparation. This includes mixing the ingredients, rolling out the dough, and cutting out those adorable shapes. Don’t rush it—this is where you can add your creative twist with various cookie cutters.
Baking time
Once your cookies are prepped, they’ll need about 10 to 12 minutes in the oven. Keep an eye on them; the goal is a lightly golden edge while ensuring those colorful candy centers melt perfectly.
Total time
All in all, you’ll spend around 40 to 45 minutes from start to finish. This quick process makes stained glass cookies an accessible treat to whip up for any occasion! With a blend of creativity and a dash of patience, you’ll impress friends and family with this dazzling treat. For more tips on cookie baking, check out resources from the American Baking Guild.
Nutritional Facts for Stained Glass Cookies
Calories
When indulging in stained glass cookies, you’ll find that each cookie typically contains around 100-120 calories. This can vary slightly based on the size and the specific ingredients you use, so keep that in mind if you’re mindful of your calorie intake.
Sugar Content
One of the standout characteristics of these beautiful cookies is their sweetness. A single stained glass cookie can have about 10-12 grams of sugar. While they’re a treat designed for special occasions, it’s worth noting that you might want to enjoy them in moderation (after all, those vibrant candies aren’t calorie-free).
Other Relevant Nutritional Information
In addition to calories and sugar, stained glass cookies include several other nutritional components that can vary widely based on your recipe. Here’s a quick rundown of what to expect:
- Fat: Depending on the butter content, each cookie may contain around 4-6 grams of fat.
- Carbohydrates: You can anticipate approximately 15-20 grams of carbs per cookie, giving you an energy boost.
- Protein: These cookies are low in protein, typically less than 2 grams.
For tips on how to tweak the recipe for healthier alternatives, you might find this article helpful. Consider using whole wheat flour or natural sweeteners to adjust nutritional values while maintaining flavor.
FAQs about Stained Glass Cookies
Creating stained glass cookies can ignite a sense of nostalgia, reminding us of the joy of baking during the holidays. If you have any lingering questions, you’re in the right place! Let’s dive into some common queries.
Can I use other types of hard candies?
Absolutely! While traditional stained glass cookies often showcase Jolly Ranchers, feel free to experiment with other hard candies like Life Savers or Werther’s Originals. Keep in mind that the colors may vary, influencing the overall aesthetic. Just ensure they can melt down well—this guarantees that beautiful “stained glass” effect!
How should I store the cookies?
Storing your stained glass cookies correctly can extend their shelf life. Here are a few tips:
- Cool completely: Before storing, allow them to cool down fully to maintain their crisp texture.
- Airtight container: Place cookies in an airtight container at room temperature. This helps retain their freshness for about 1-2 weeks.
- Avoid humidity: Find a cool, dry spot away from direct sunlight to prevent any sogginess.
For long-term storage, consider freezing them. Just wrap each cookie in plastic wrap, place them in a freezer-safe bag, and they’ll last for up to three months!
Are there gluten-free options for this recipe?
Definitely! You can make stained glass cookies gluten-free by substituting regular flour with a gluten-free blend, like almond flour or coconut flour. Check out brands like Bob’s Red Mill or King Arthur for reliable gluten-free options. Just be aware that the texture may differ slightly, but the deliciousness will still be there!
Curious about more baking tips? Consult resources from the American Baking Guild for expert advice on gluten-free baking.
By addressing these common queries, I hope you’re feeling more at ease with your baking adventure. Happy baking!
Conclusion on Stained Glass Cookies
Recap of why making these cookies is worth it
Creating stained glass cookies is not just a fun baking experience; it’s a gateway to impressing your friends and family with vibrant, eye-catching treats. These cookies can elevate any occasion, from holiday gatherings to casual get-togethers. The satisfaction of pulling beautifully crafted cookies from the oven gives a unique joy that is hard to replicate. Plus, experimenting with colors and shapes becomes an art form in your kitchen!
Encouragement to try the recipe at home
So why not give it a go? Baking stained glass cookies at home promises both creativity and deliciousness. Gather some friends or your partner and make it a fun DIY project; we guarantee you’ll create memories as sweet as the cookies themselves. For tips on perfecting your cookie creations, check out expert baking resources like Joy of Baking or BBC Good Food. Happy baking!
PrintStained Glass Cookies: The Best Colorful Treats for Any Occasion

Delight in the colorful and delicious Stained Glass Cookies, perfect for any celebration!
- Prep Time: 30 minutes
- Cook Time: 10 minutes
- Total Time: 40 minutes
- Yield: 24 cookies 1x
- Category: Desserts
- Method: Baking
- Cuisine: American
- Diet: Vegetarian
Ingredients
- 1 cup unsalted butter, softened
- 1 cup granulated sugar
- 1 large egg
- 1 teaspoon vanilla extract
- 2 cups all-purpose flour
- 1 teaspoon baking powder
- 1/2 teaspoon salt
- 1 cup crushed hard candies (like Jolly Ranchers)
Instructions
- Preheat the oven to 350°F (175°C).
- In a bowl, cream together the butter and sugar until light and fluffy.
- Add the egg and vanilla, mixing until combined.
- In another bowl, whisk together the flour, baking powder, and salt.
- Gradually add the dry ingredients to the wet mixture, mixing until combined.
- Roll out the dough and cut into desired shapes, then make a cutout in the center.
- Fill the cutout with crushed candies.
- Bake for 8-10 minutes or until the edges are lightly golden.
- Let cool completely before serving.
Notes
- For best results, use a variety of candy colors for more vibrant cookies.
- Store in an airtight container to keep them fresh.
Nutrition
- Serving Size: 1 cookie
- Calories: 120
- Sugar: 10g
- Sodium: 50mg
- Fat: 8g
- Saturated Fat: 5g
- Unsaturated Fat: 2g
- Trans Fat: 0g
- Carbohydrates: 15g
- Fiber: 0g
- Protein: 1g
- Cholesterol: 30mg
Keywords: Stained Glass Cookies, colorful cookies, festive treats